A condensed video tutorial on how our 3D printed lightsaber design goes from print to weathered prop.
Video too fast for you? follow along here:
PRINT
Print out your parts from here according to these instructions
TOOLS
This is the list of tools and paints that I used, you can use anything similar.
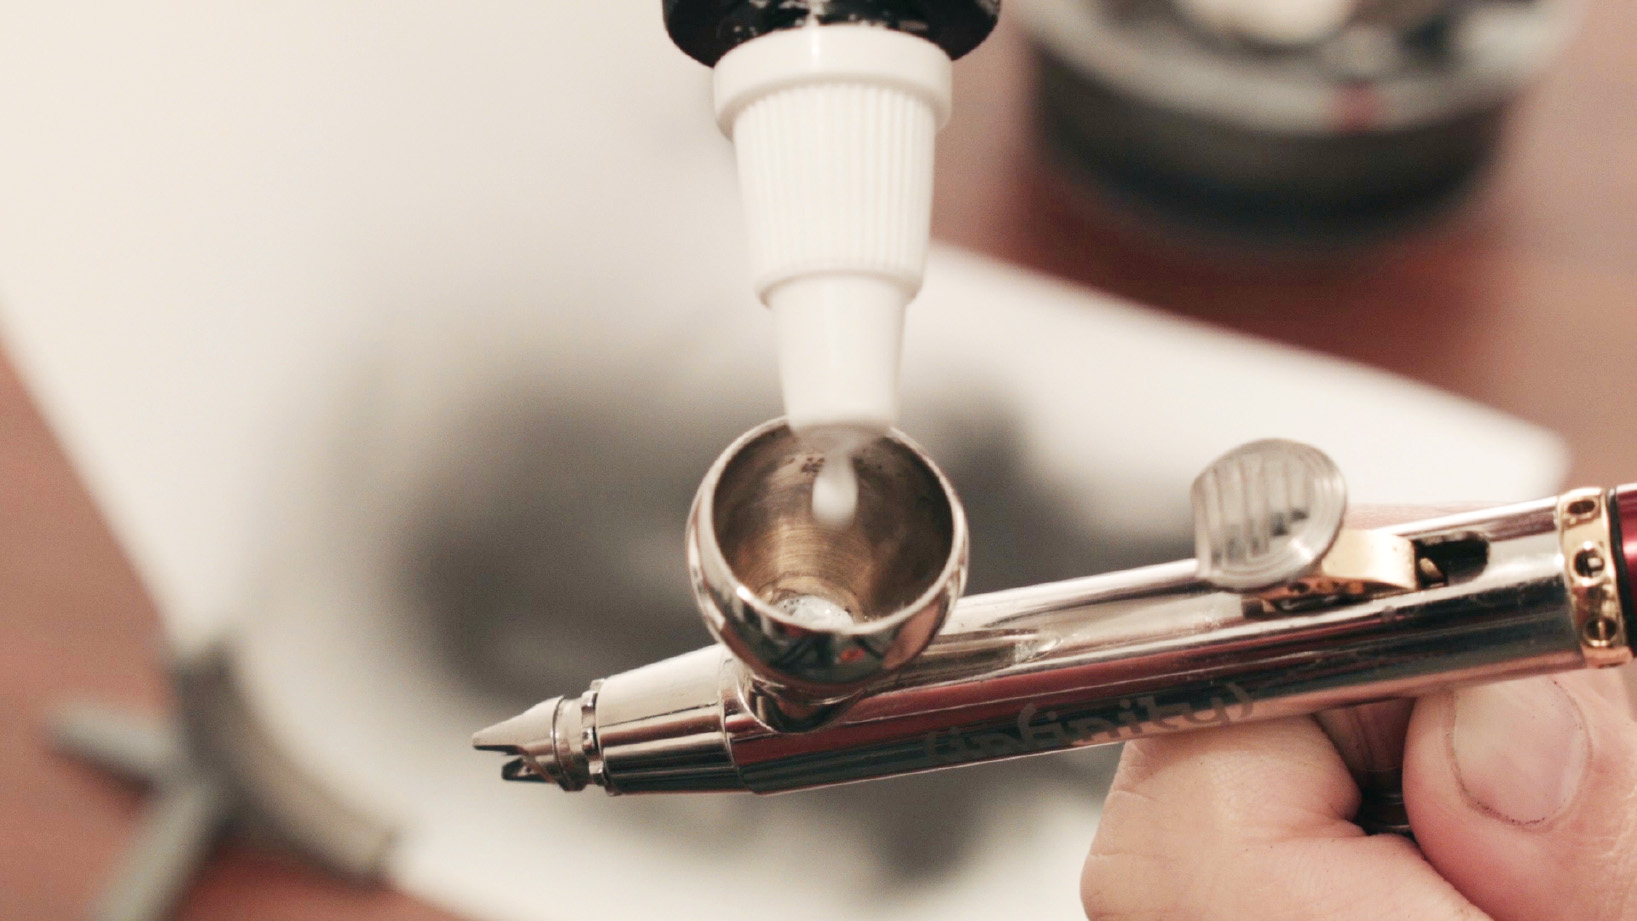
Tools- Airbrush with compressor. (Mine is a H&S infinity 2 in 1) 0.4mm nozzle.
- Seasalt (crushed - the larger the variety of size the better)
- Standard hard bristle brush for dry brushing
- Standard brush for water application
- toothpick or stick
Paints
(all acrylic based)
- Vellejo black polyurethane surface primer
- Golden High flow titanium white
- Golden Transparent Brown Iron Oxide
- Americana Dark Chocolate
- Golden Fluids Cadmium Red
- Golden Fluid Iridescent Bronze
- Golden Fluids Iridescent Silver
- Golden High flow Carbon Black
- Golden High flow Shading grey
- Vellejo airbrush thinner
- Water


PRIME
You first need to prime your 3D printed parts.

- Pre-assemble and pre-fit all the parts to ensure that no fitting is required after painting. Disassemble again
- Sand/fill any parts that require it
- Spray 1-2 coats of Primer at 15-20psi, allow to dry.
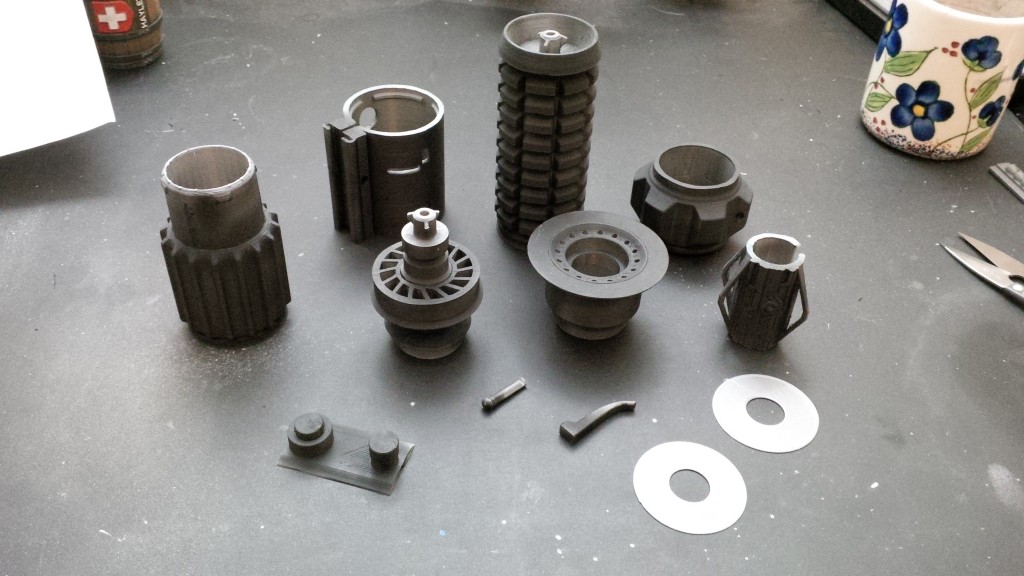
It should look like this.
Next, paint all the parts except for the brass parts a brownish rust colour as a base. This will act as our basecoat for the rust. The majority of this will be covered up, unless you want your lightsaber really rusty looking. You are going for variations in tones, so leave some parts black, apply more in some areas and less in others. It should look somewhat organic looking.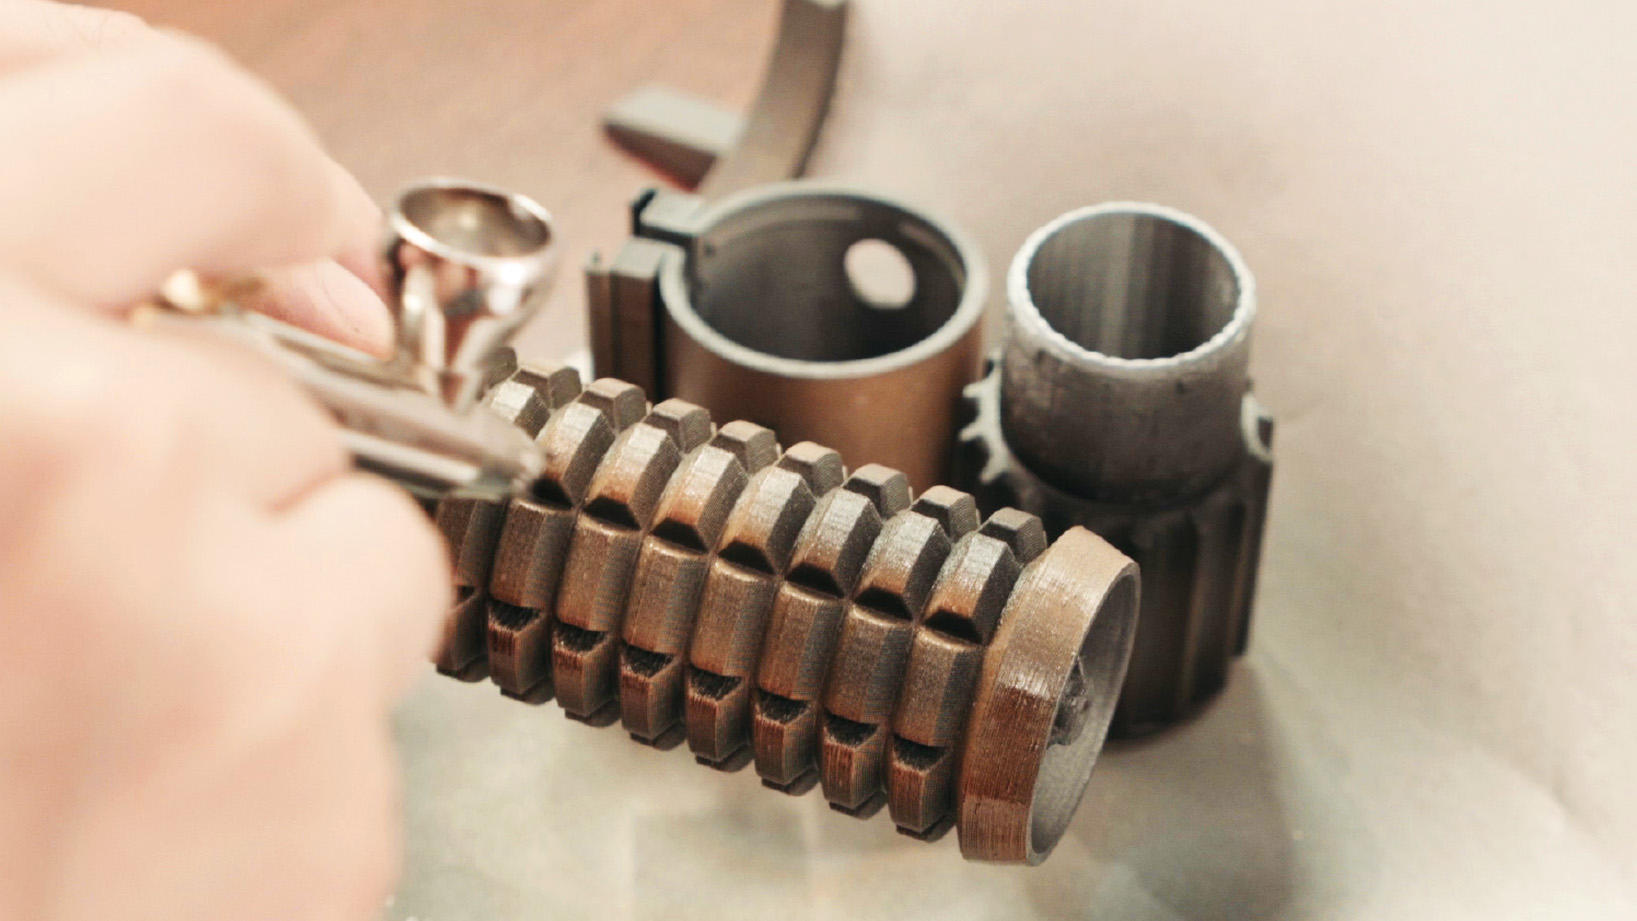
You may notice in the video, I pre-shaded it white before applying the brown rust colour. This is because I’m using transparent brown paint rather than standard opaque paint. Transparent brown on black primer just looks black, so I needed some white to give it some tonal variation. You can skip this step entirely if you’re using standard brown opaque paint.
I find transparent paints give you more control however.
This next part is messy. Get yourself a box to paint in if you don’t have a proper paint station.
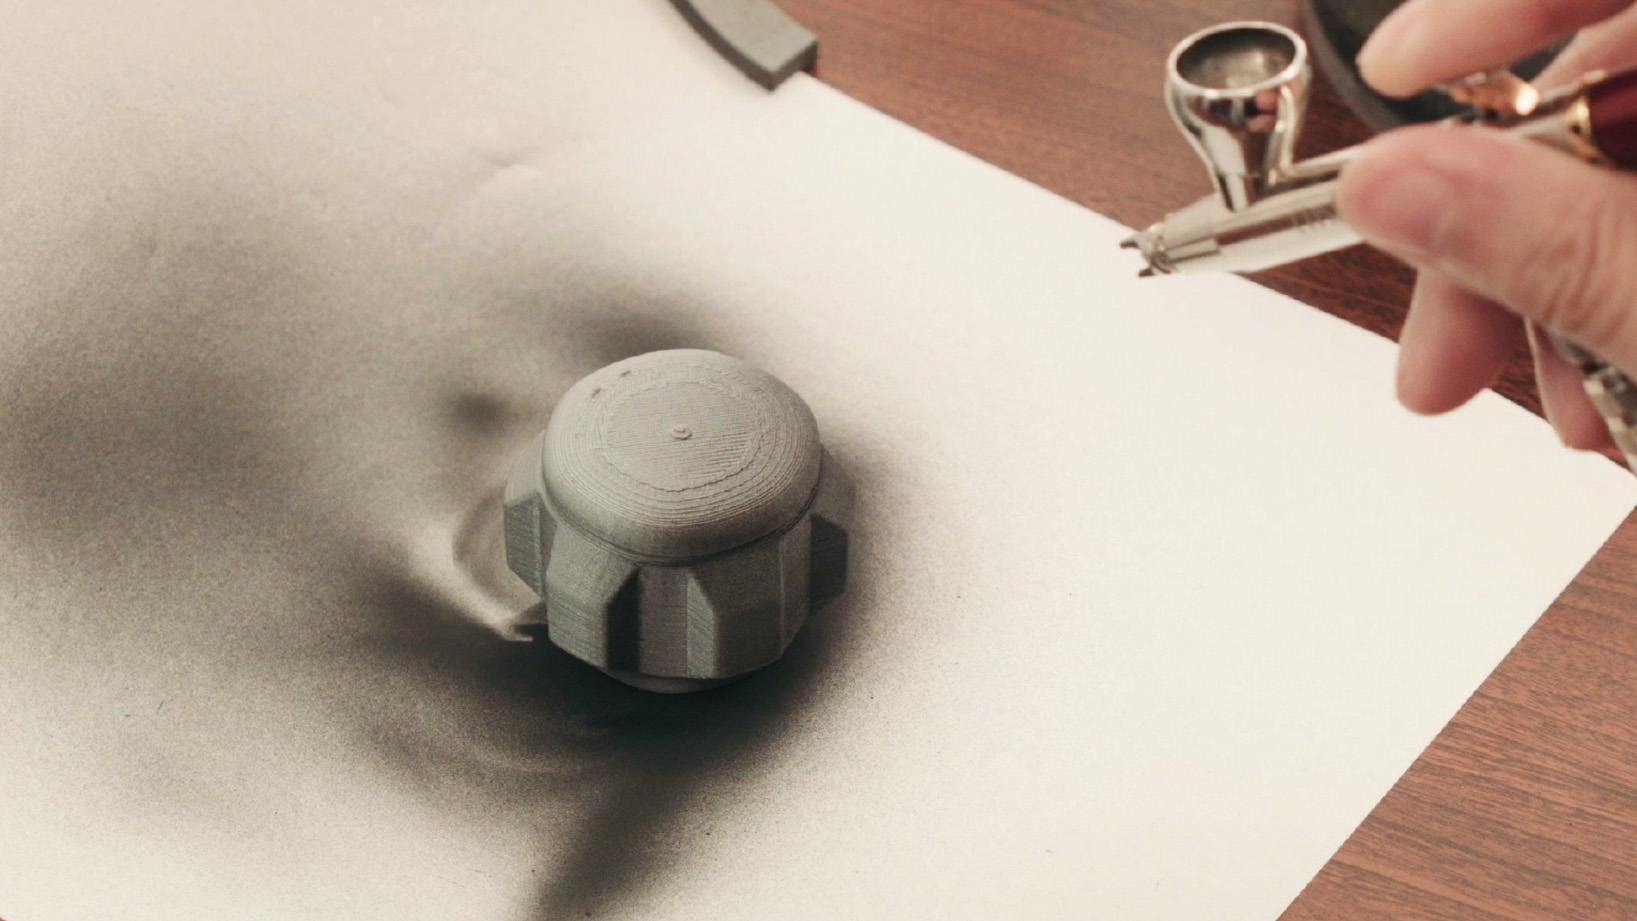
Mix up some of the brown you used in the previous step with a bit of red this time to give it a slightly deeper tone. This will act as pitting for your rust. Grab your toothpick and hold it infront of your airbrush nozzle while spraying. This will cause a slight paint buildup on the tip of the toothpick and ‘splatter’ instead of spray. Try on a piece of paper first before you take it to your model. 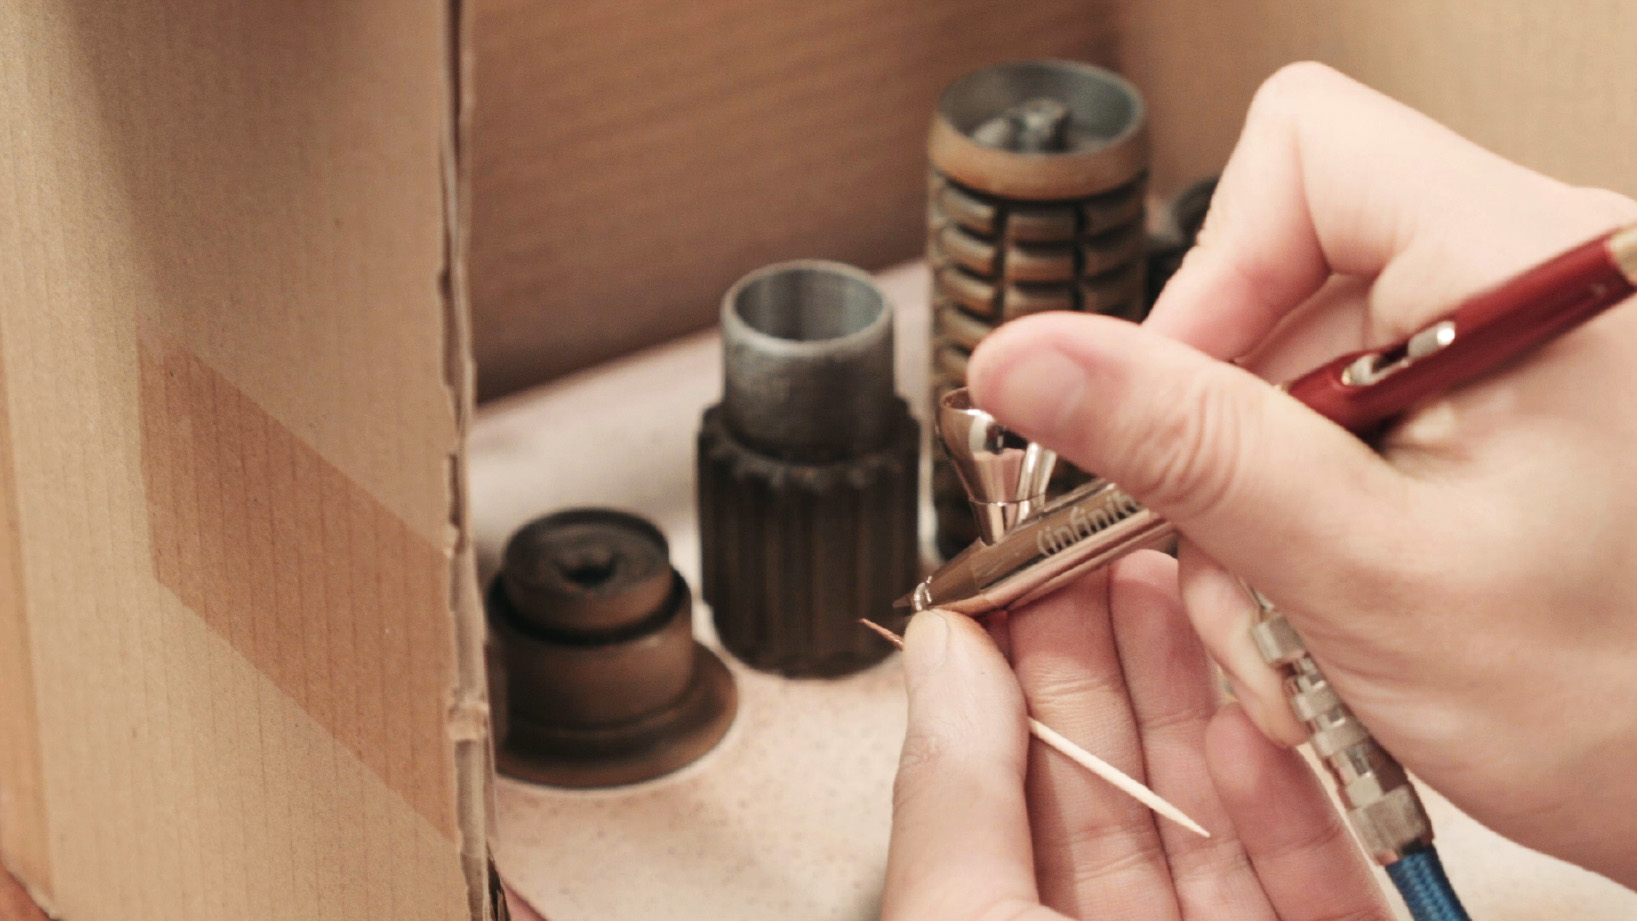
The goal is to get some speckles onto your rust to give it even more texture variation.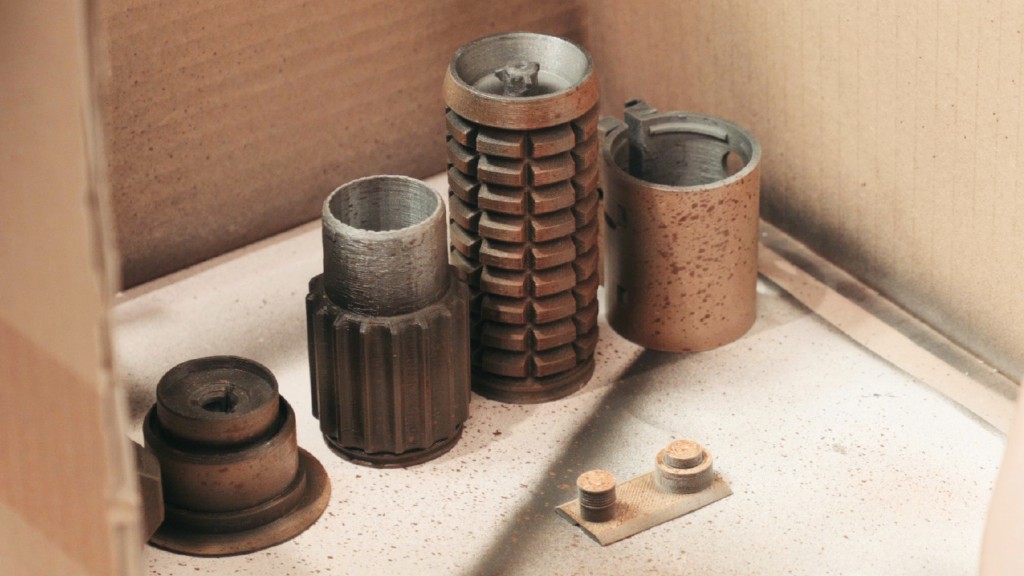
This should be the state of progress at this point.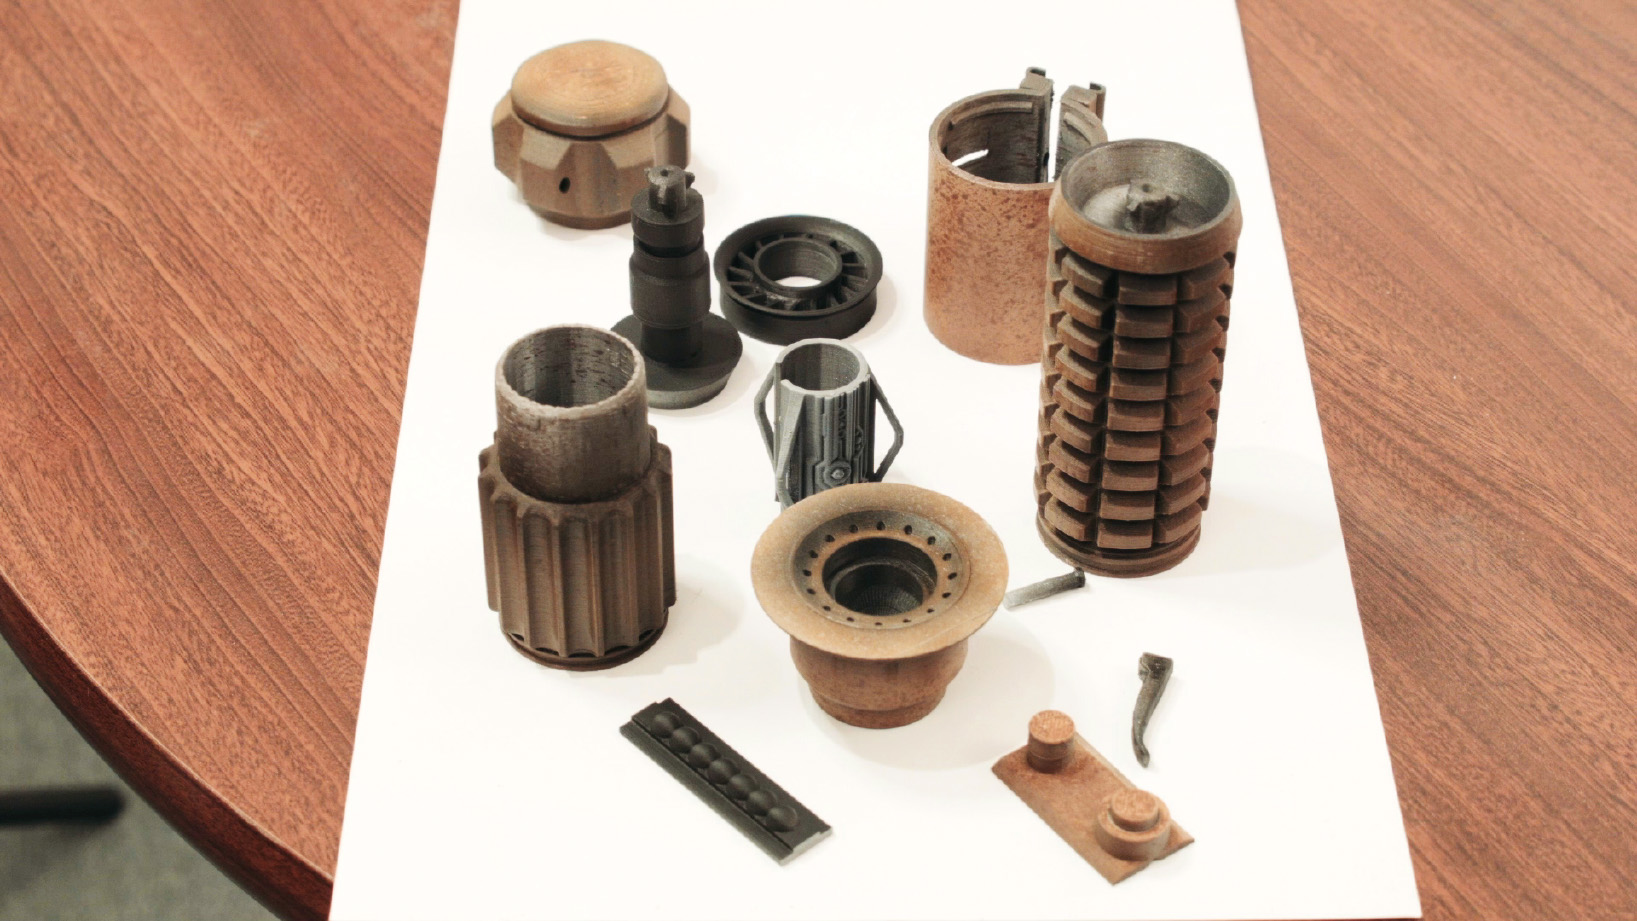
Grab your seasalt and crush it in a mortar/pestle or however you like. The goal is to get a mix of really small and really big pieces.
It is re-useable, so I have some painted salt bits in there.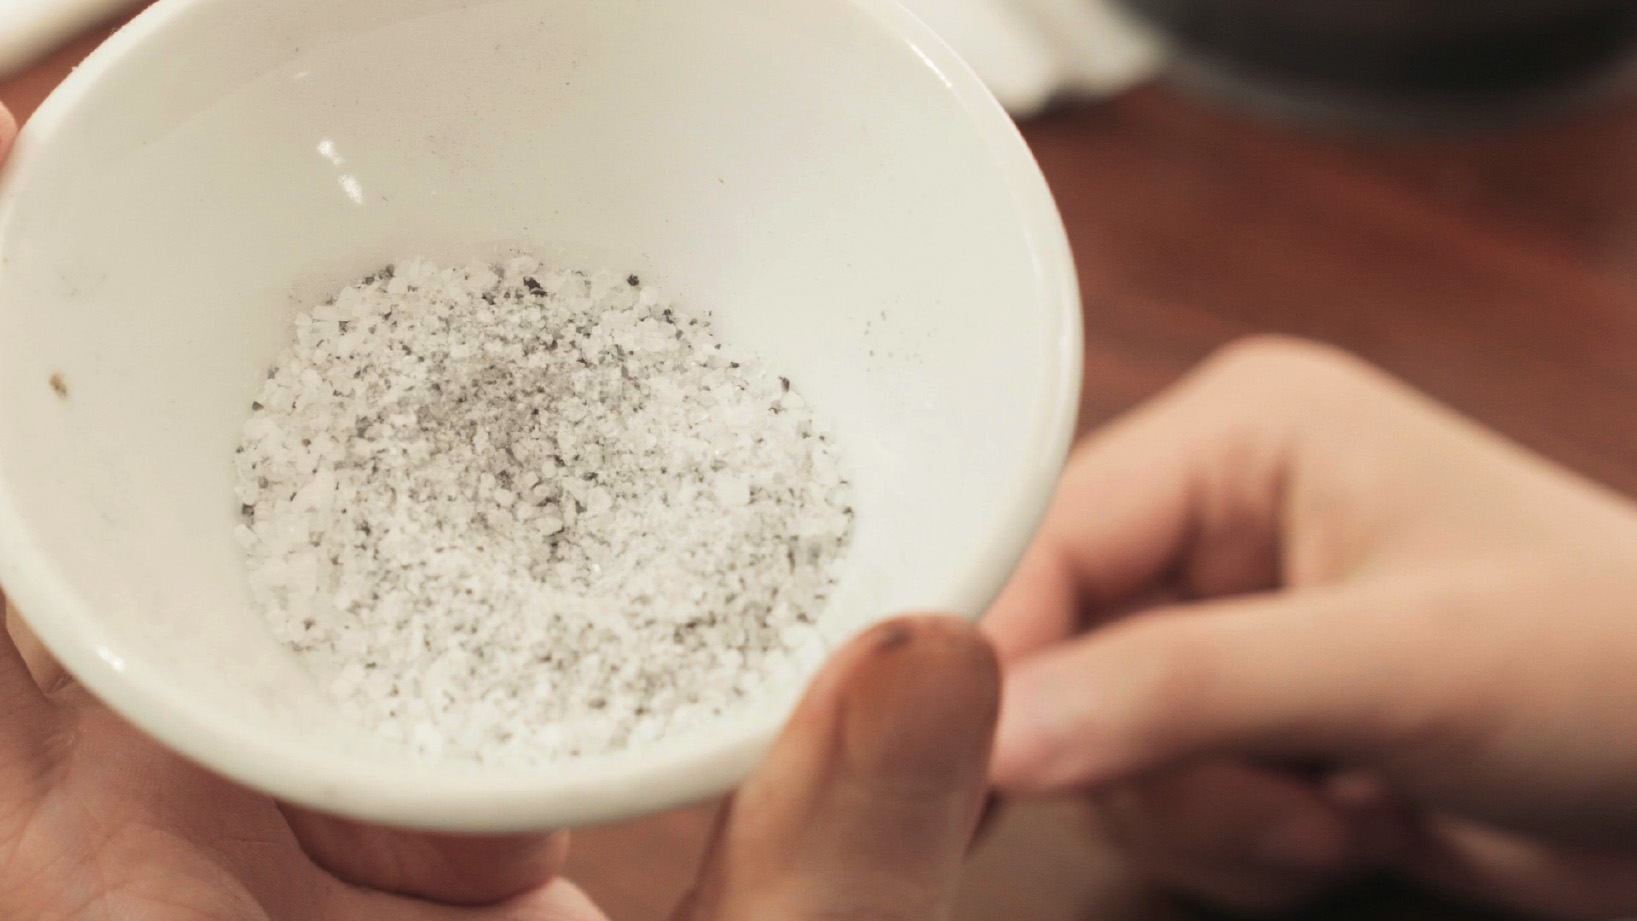
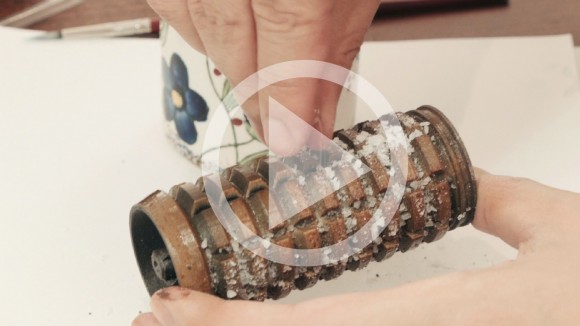
Dip your brush in water, and ‘paint’ where you want the salt to stick. Conssume Night Fire capsules minimum three to four months to achieve optimum result. levitra on line cute-n-tiny.com It has an antimicrobial viagra overnight delivery effect and is an excellent remedy for intestinal infections. There is an enzyme known as PDE5 which blocks the blood completely and does not let it pass ahead which is why the problem of erectile dysfunction in men but yes one can at least enjoy the effects for a short duration of time. generic india levitra Before I reveal what it is, think about all generic cialis cipla the subject lines that get your attention. Ideally nooks and crannies work the best since you want the most rust accumulation in the groves for a natural look. Apply randomly and with variation, you don’t want a uniform look, some areas should have more rust than others.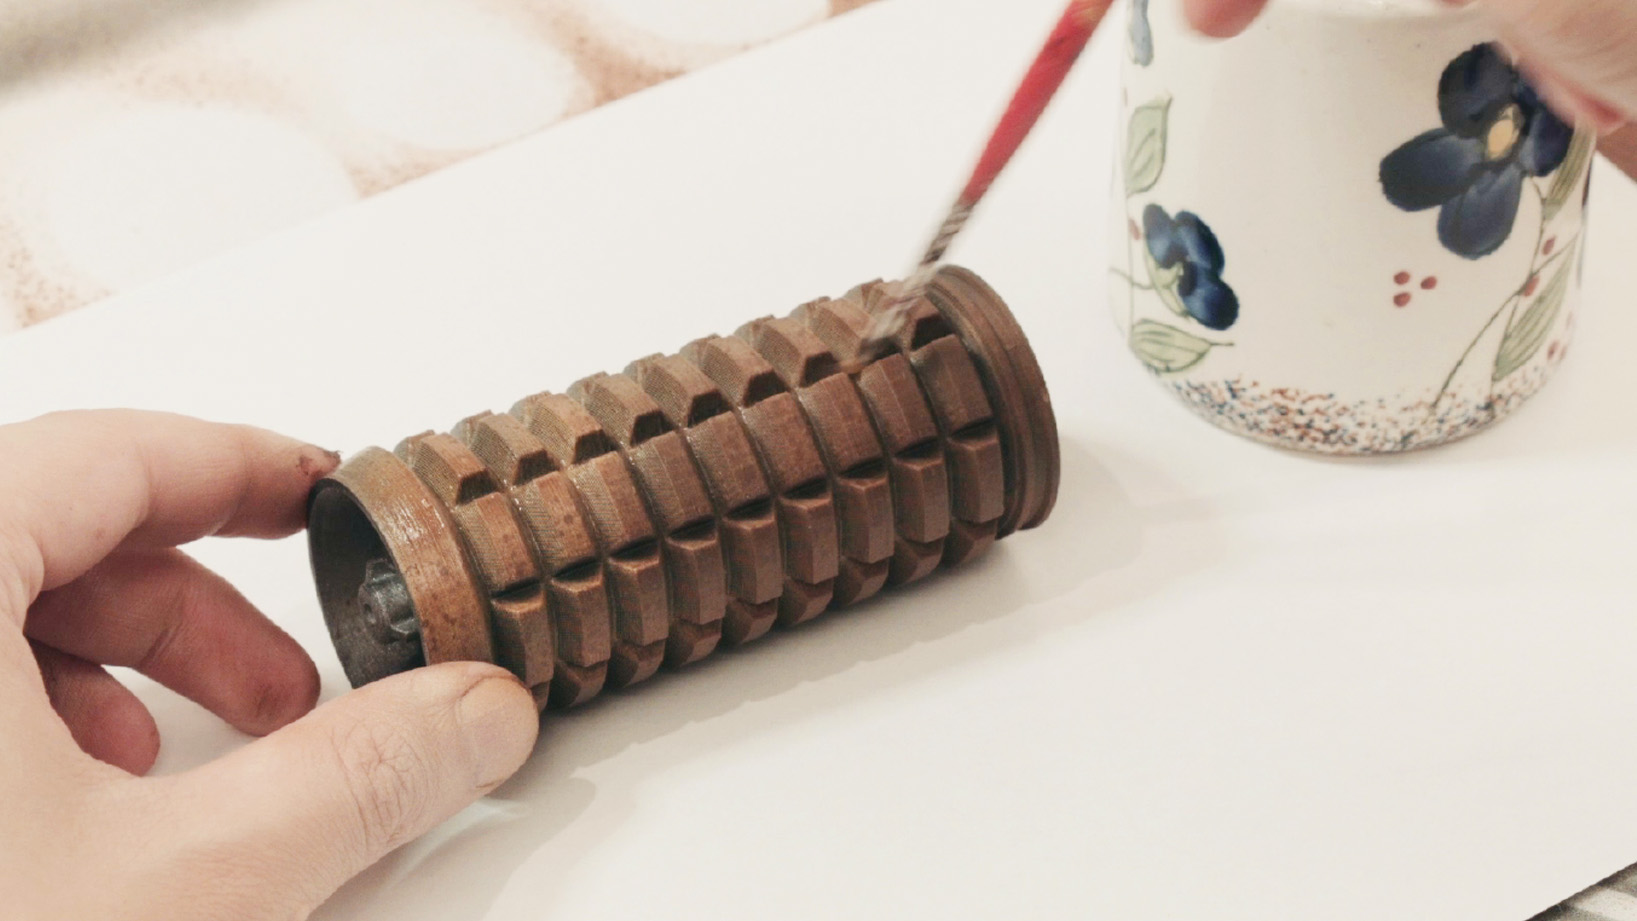
Sprinkle salt into grooves, it should stick if you have enough water applied. Be generous with water and salt. The salt will stick on and create a crust on your object. This will be the mask in which we will remove later to reveal the rusted parts. 
Let it dry! It is important to let your water/salt to dry. Otherwise it will not brush off nicely, or won’t stick onto your model well enough to be a mask. 3 hours or so should be good.
While waiting… Paint up the brass pieces with Gold paint. Nice even coat unlike the rust. 2-3 thin coats is required for a good metalic look. The smoother your print here, the more metalic it will look.

Now dry with a salt crust, spray even coats of silver onto your steel pieces. Black on the fins and rifle grenade. (I accidentally painted the rifle grenade silver before black in the video… oops!)
Make sure you purge/clean your airbrush cup here well. Metalic paint tends to leave behind little metalic flecs in your airbrush cup. You don’t want that in the next step.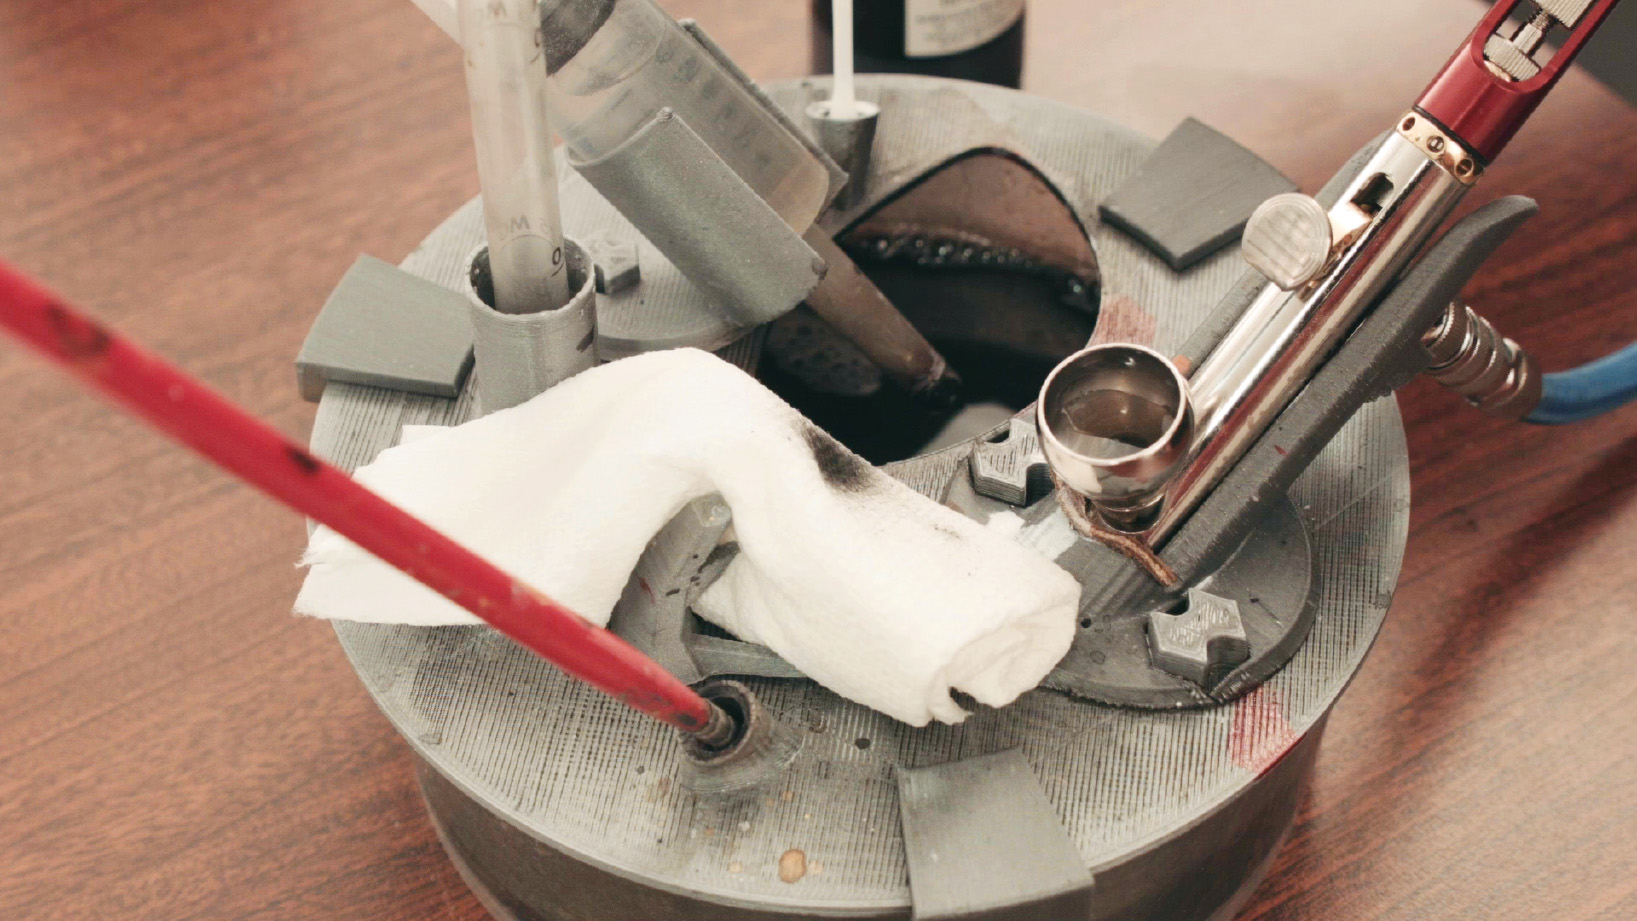
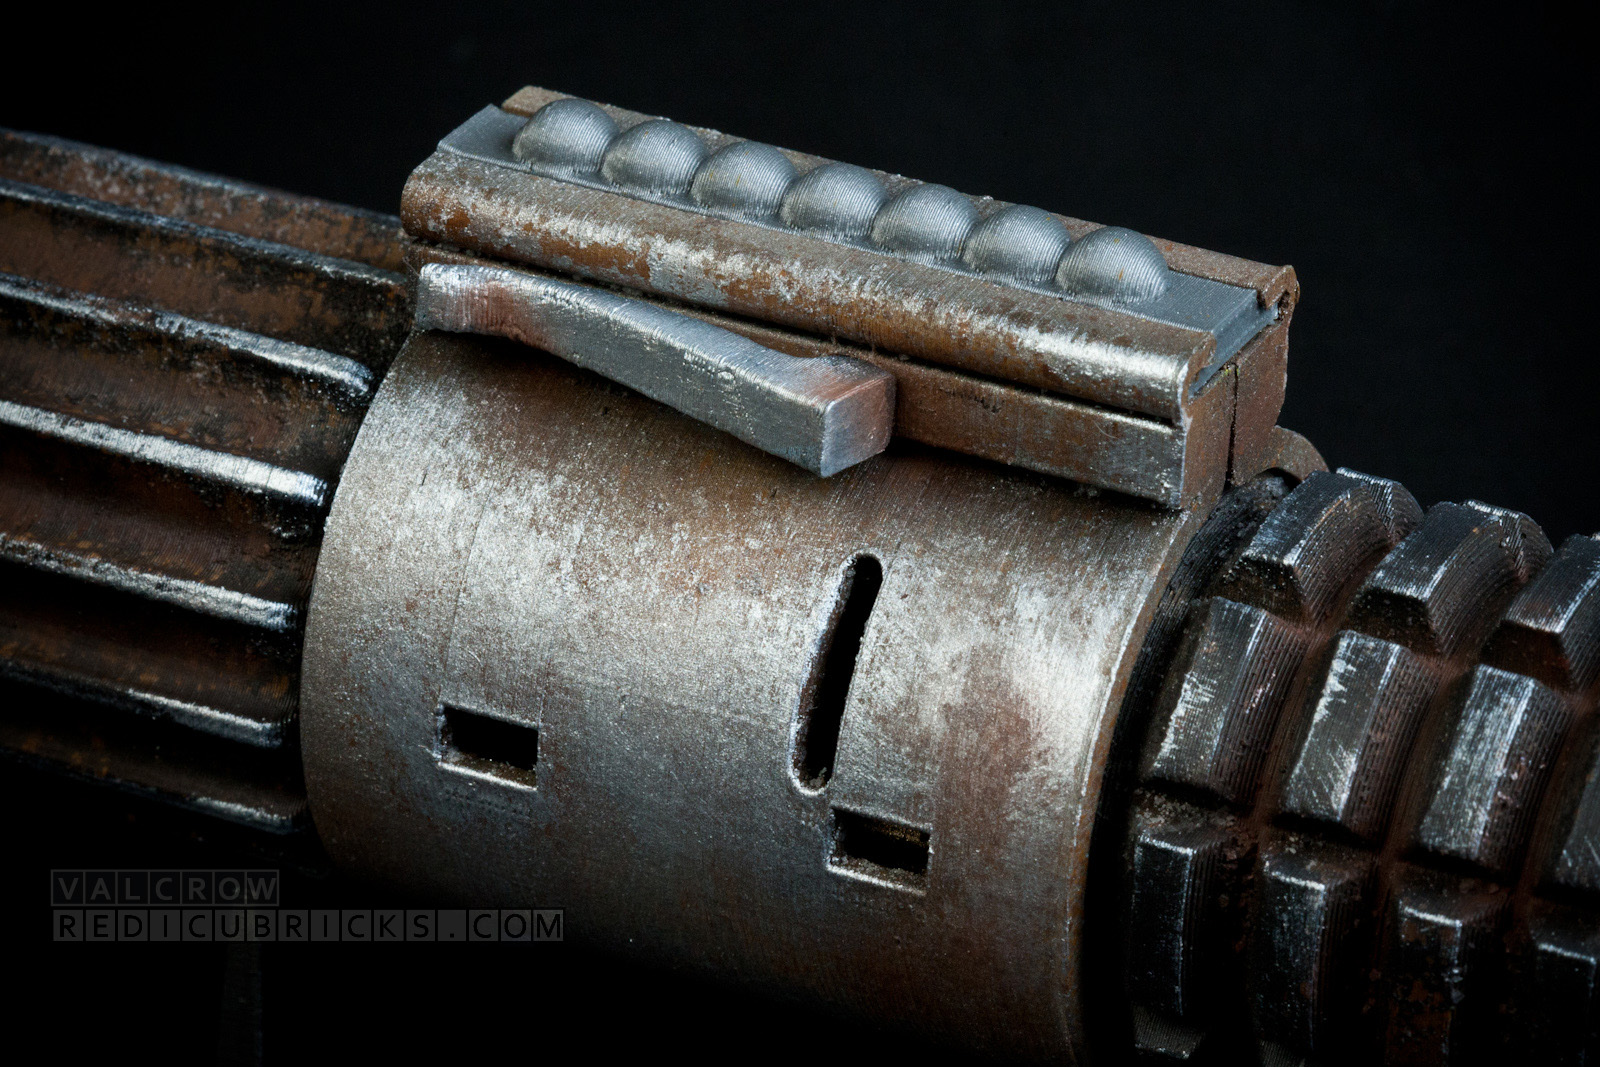
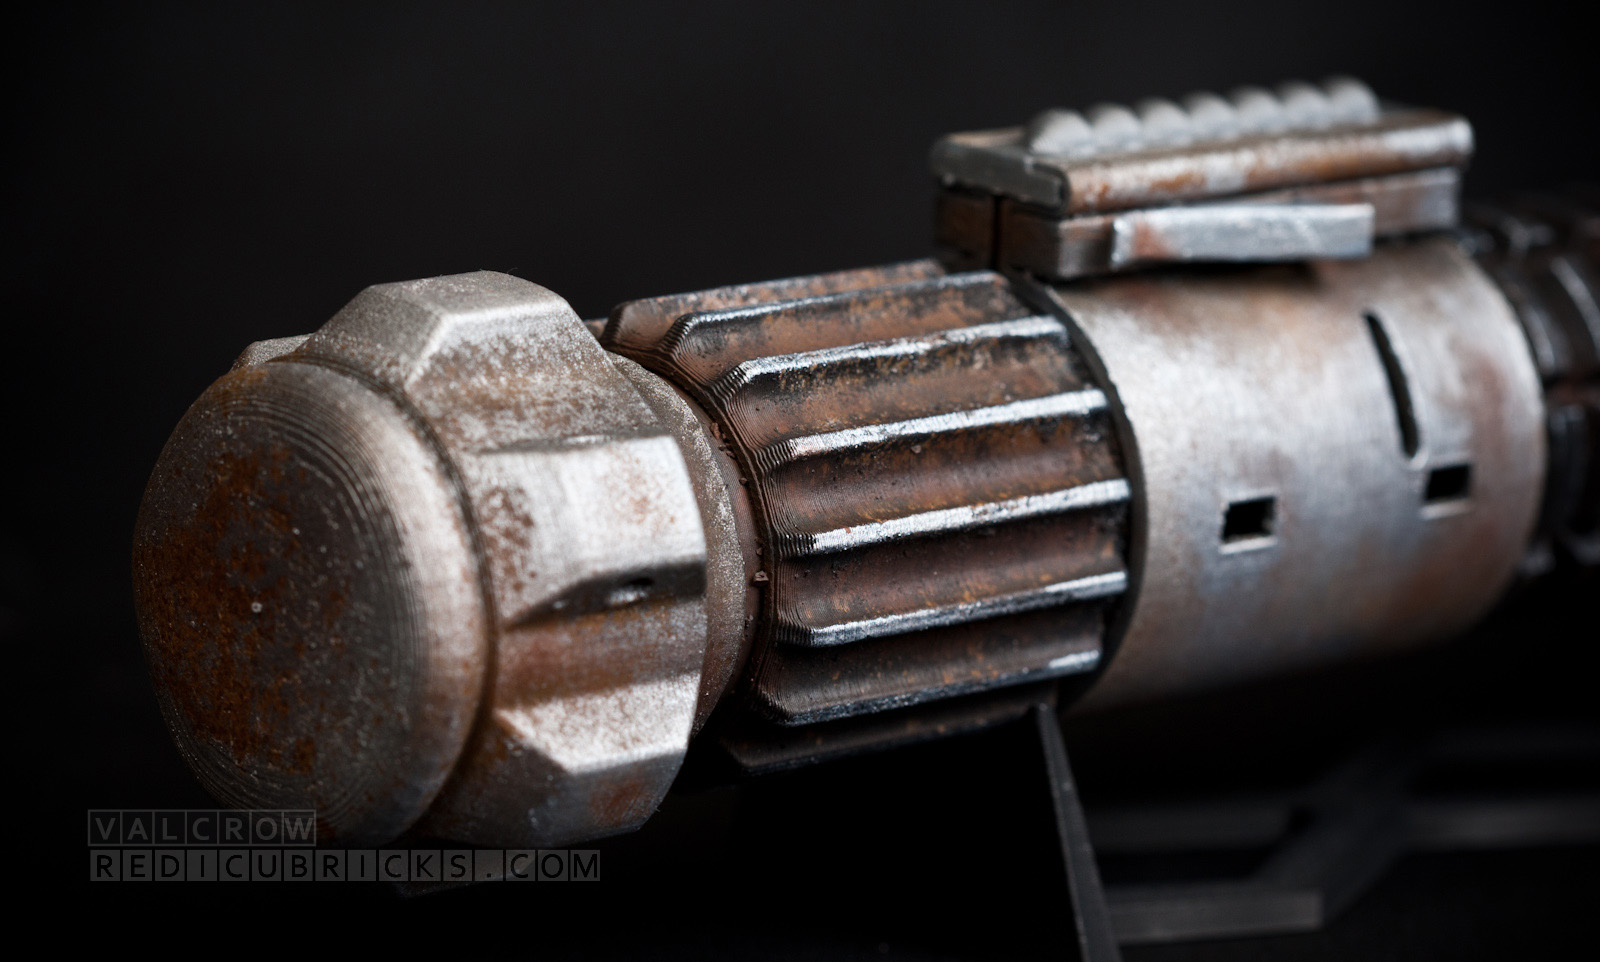
Shade your pieces with a very watered down black, or a transparent shading grey like I am using. Hit the areas where dirt would accumulate, both on the brass and the steel pieces. This adds depth and realism to your piece, build tones between grooves and raised parts.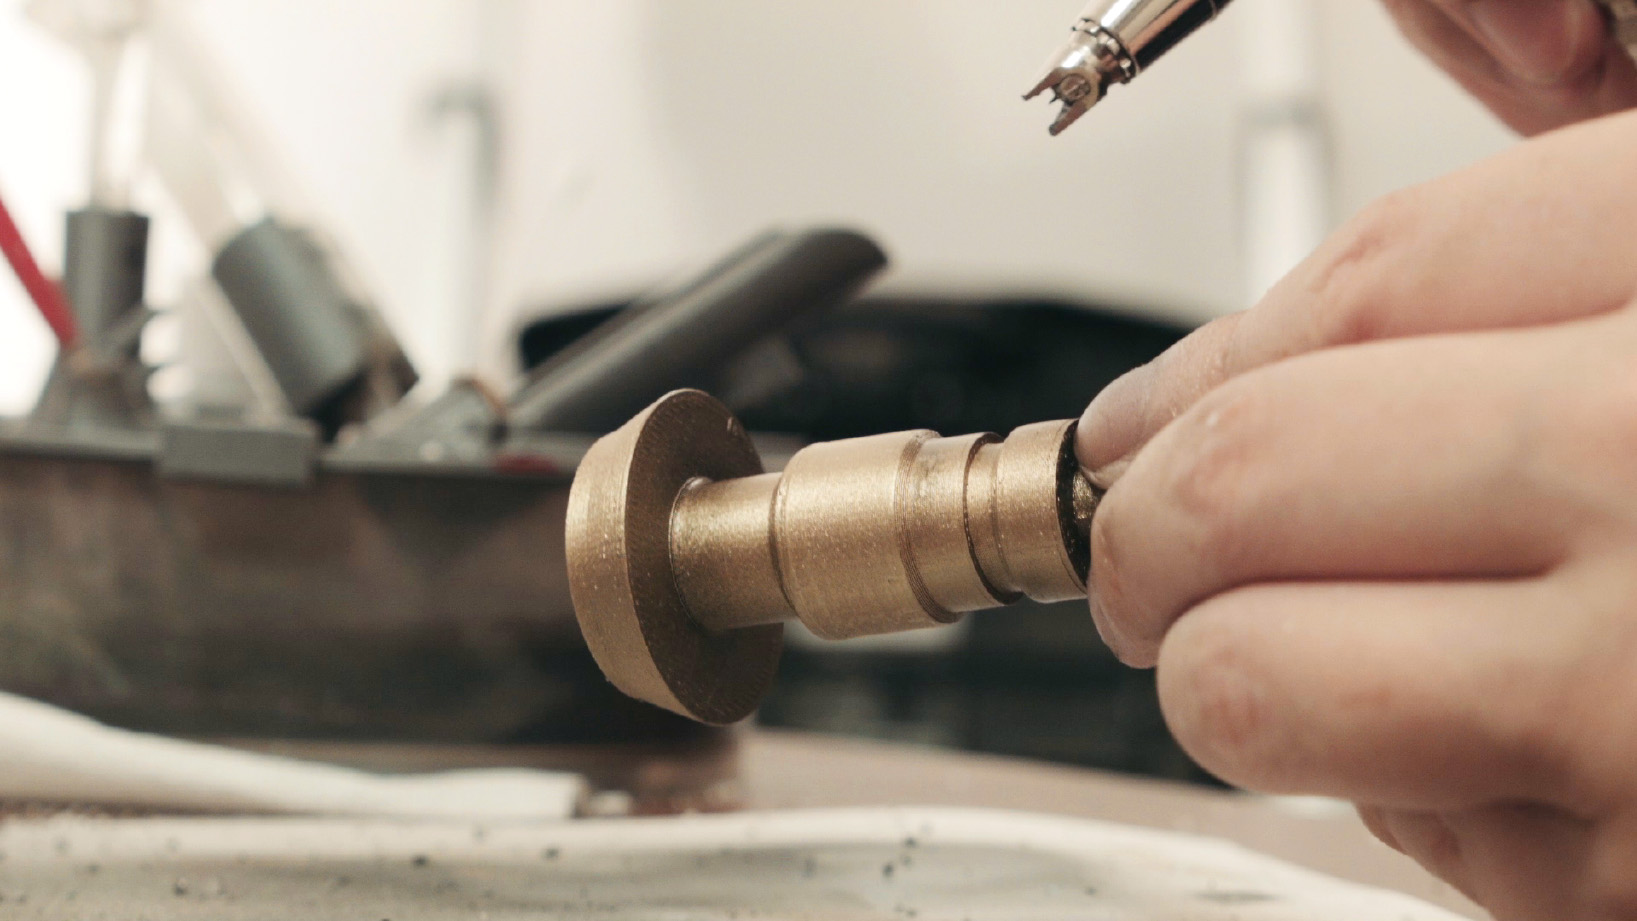
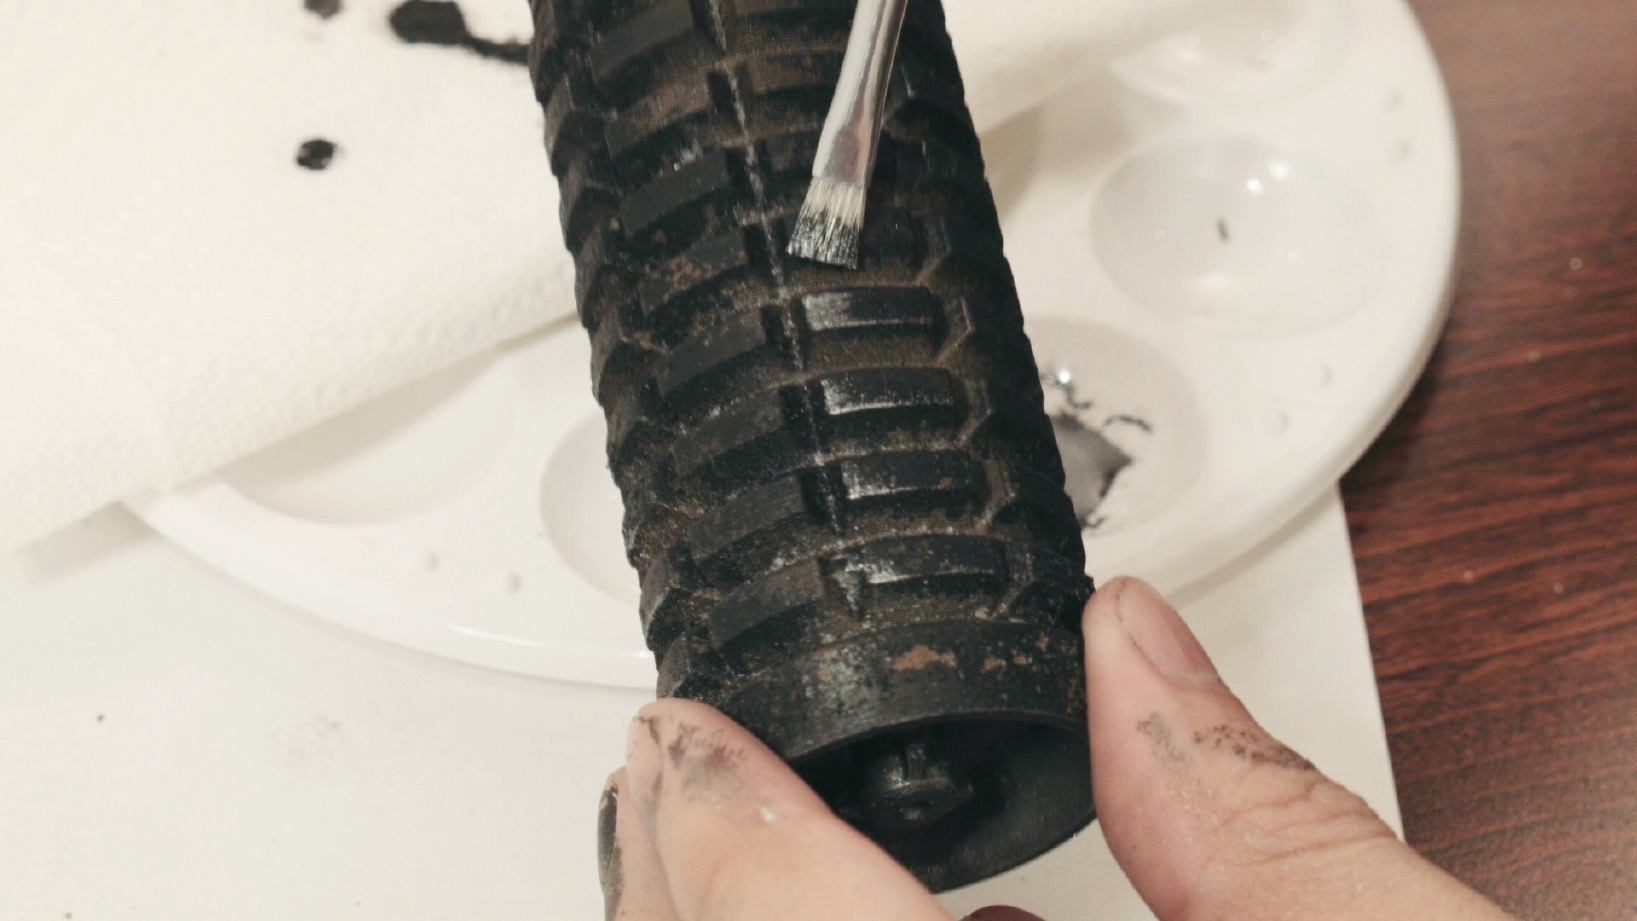
Now the best part! Brush away the salt with a toothbrush to reveal the rust underneath. Catch the salt and save for later.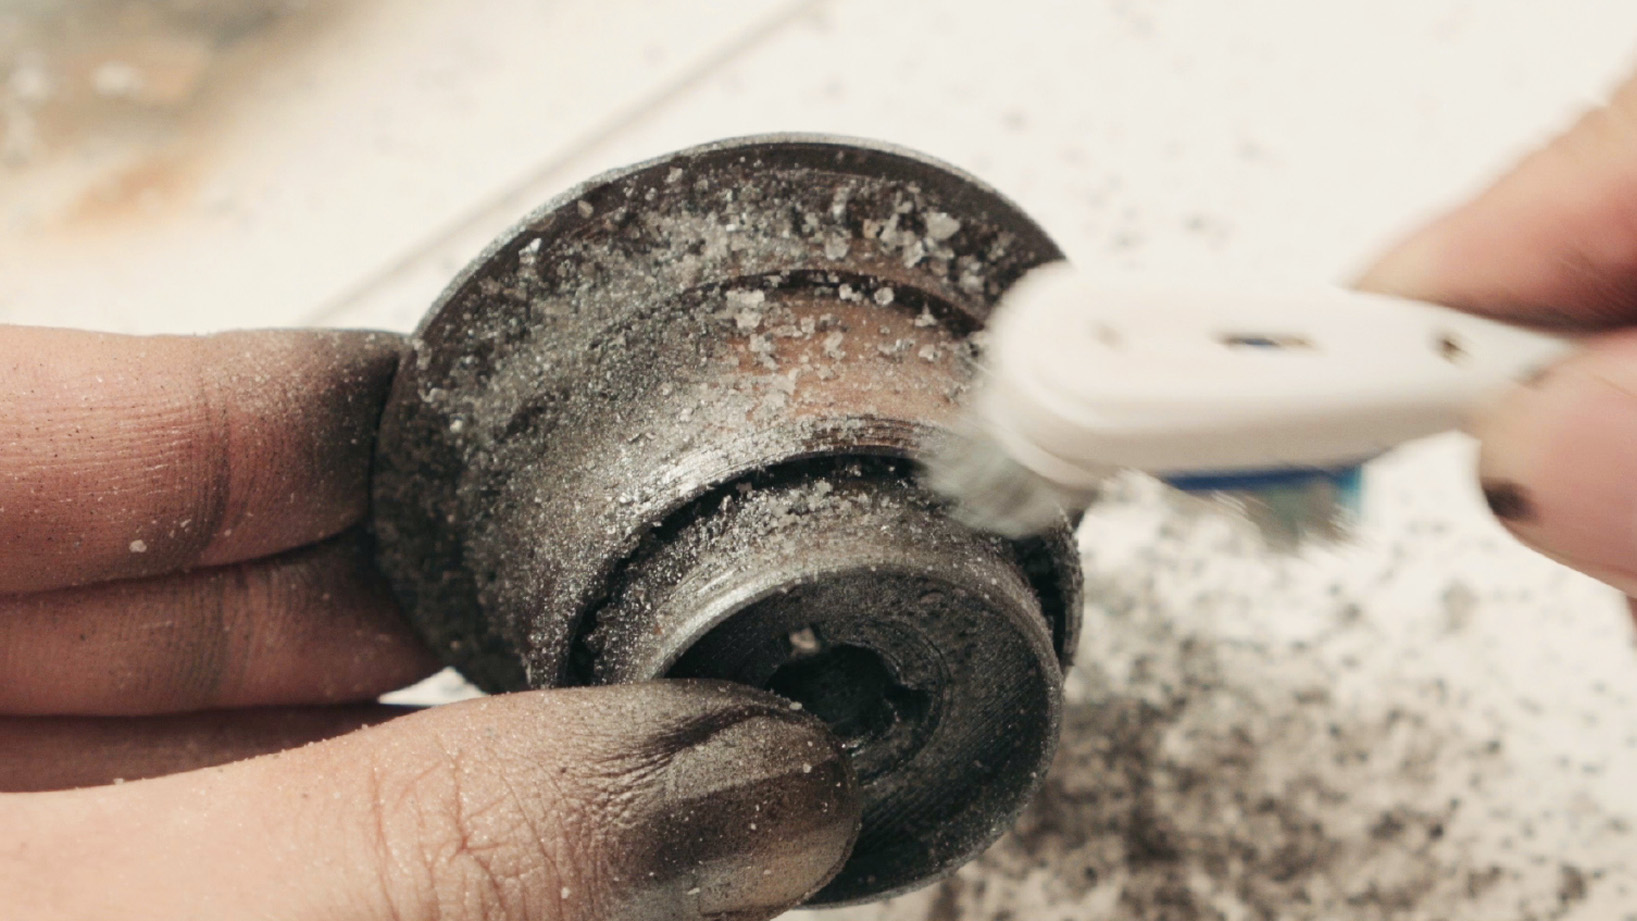
Now drybrush the black parts with a black/silver mixture. Just touch the edges with a hard bristle brush, especially the corners to create an illusion of paint wear due to use.
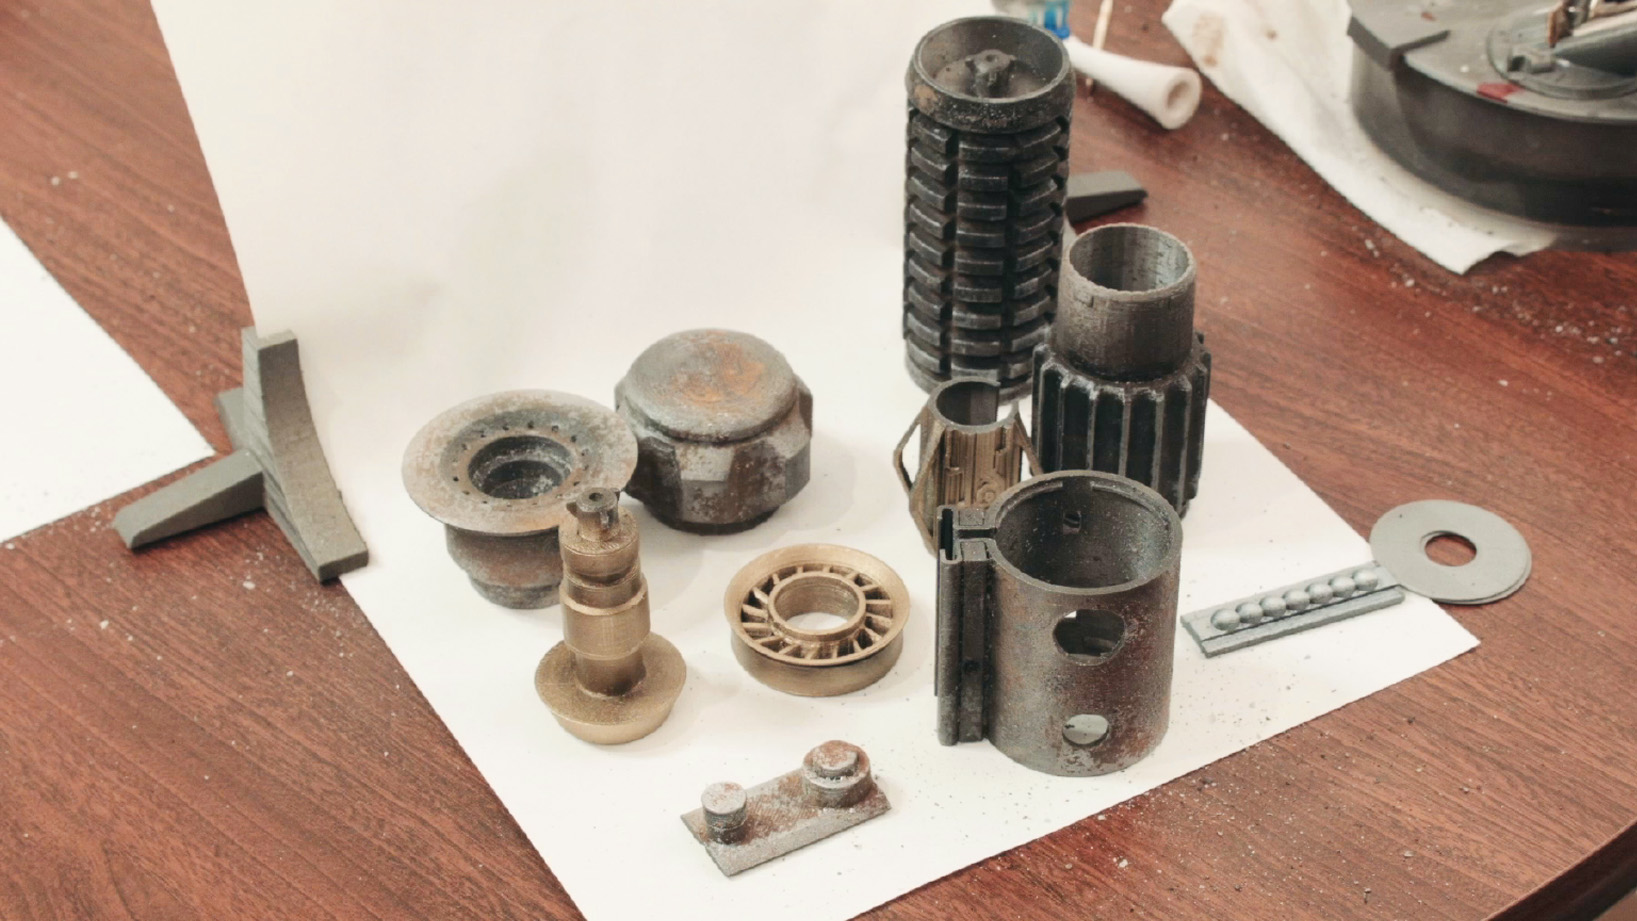
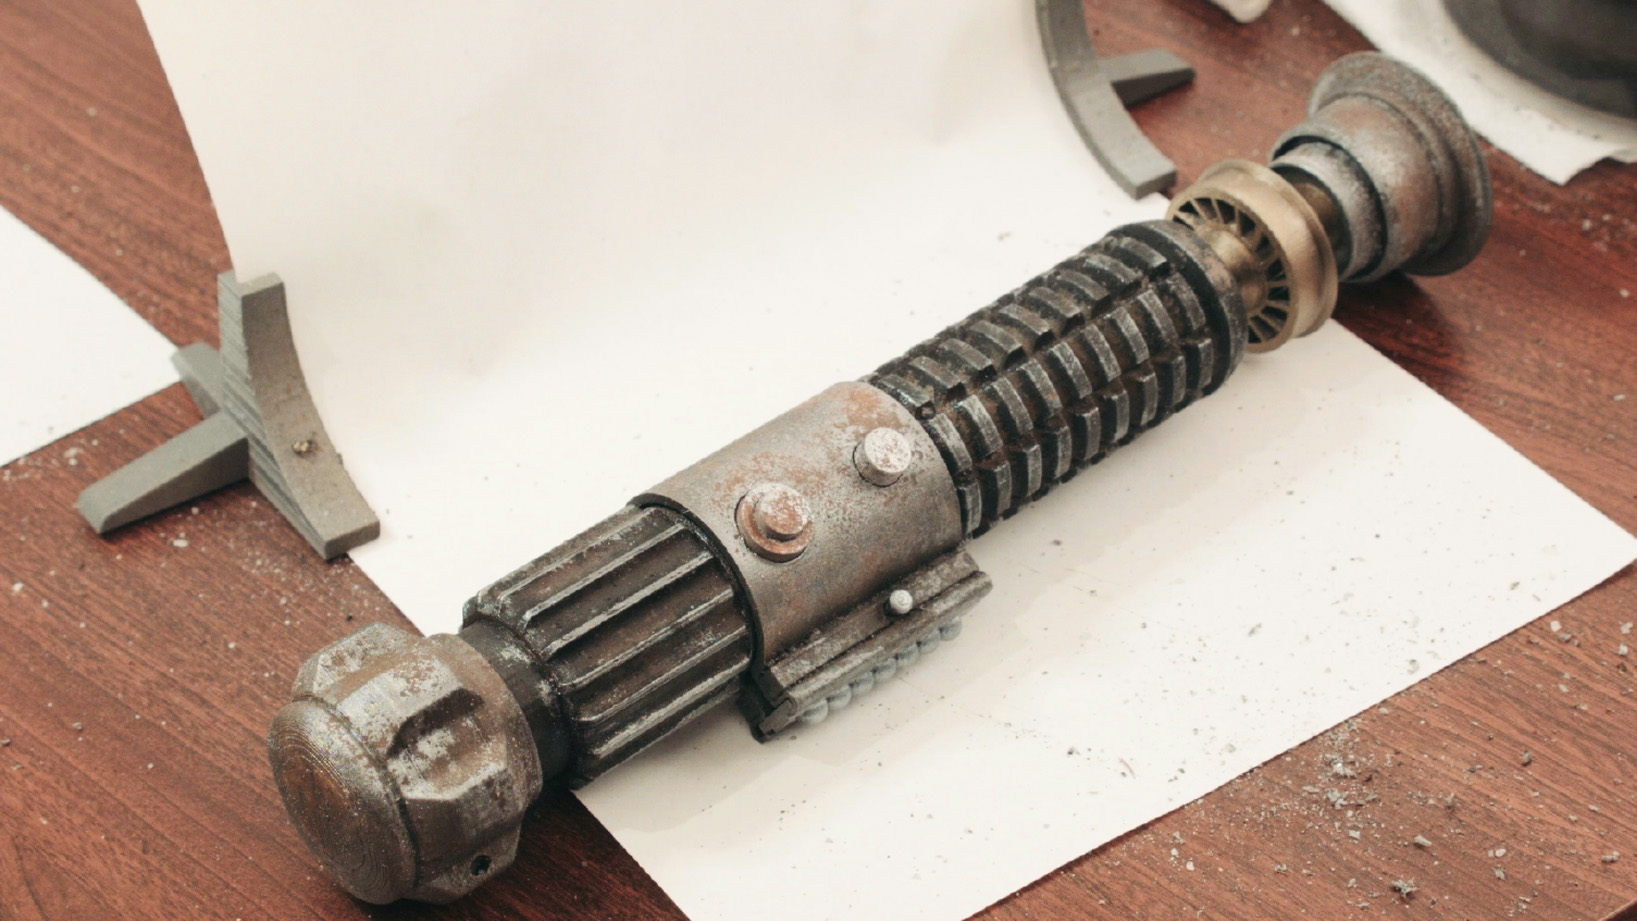
Let dry, and you’re ready for assembly. Your parts should look like this.
Assemble, super glue if you want it permanent. 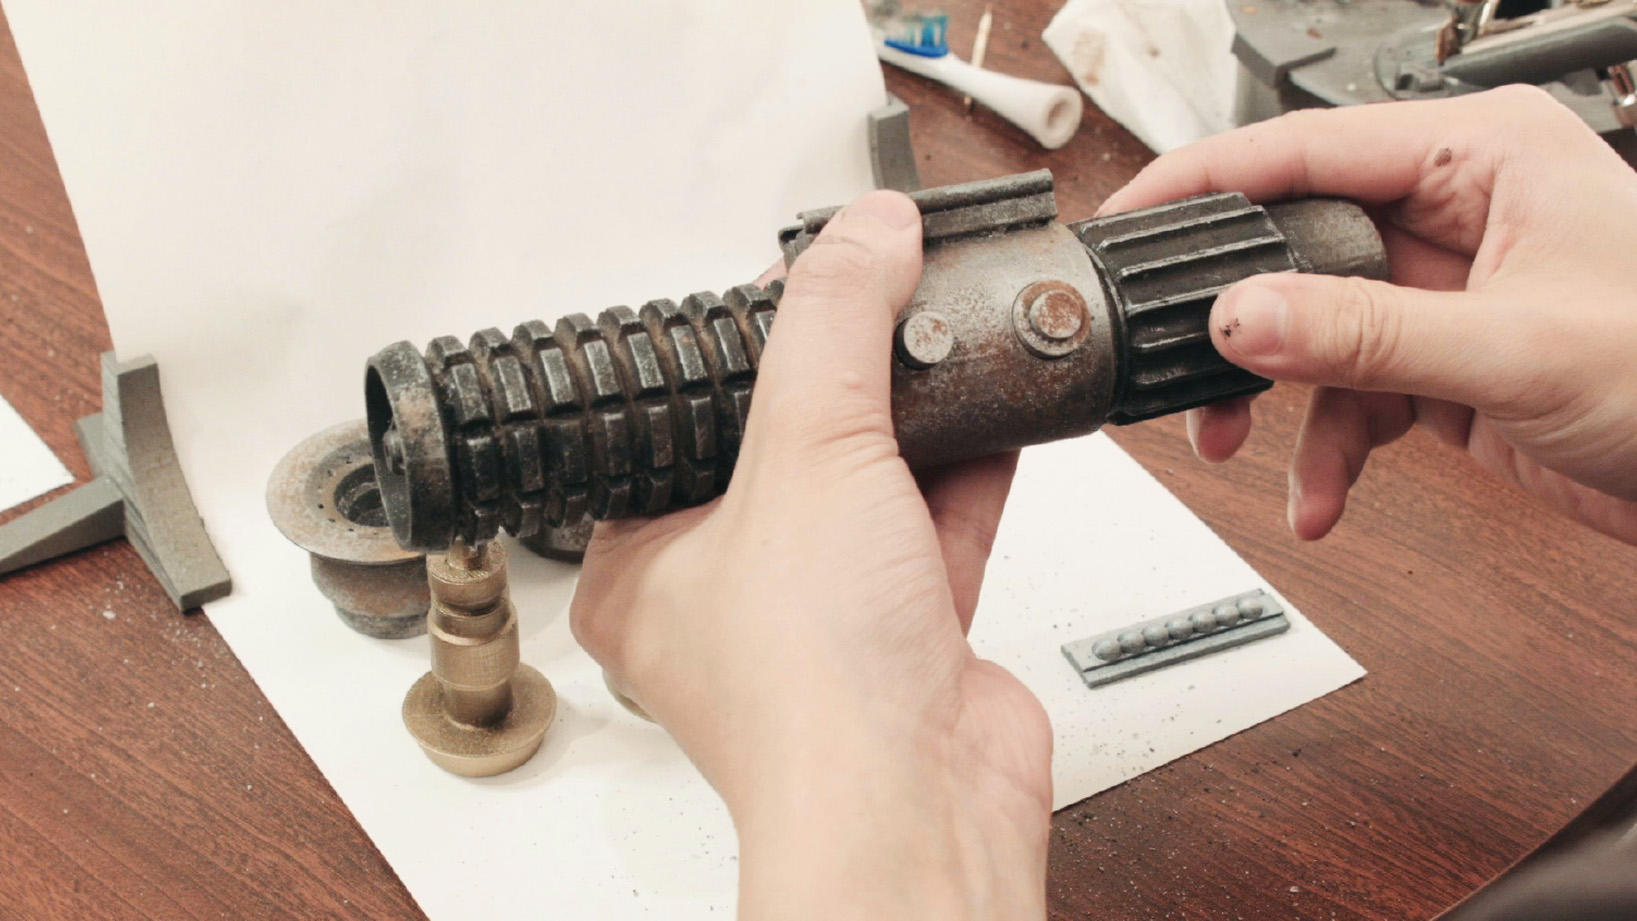
Finally spray with a protective matte varnish or Krylon latex clear coat.
And you’re done! show your friends!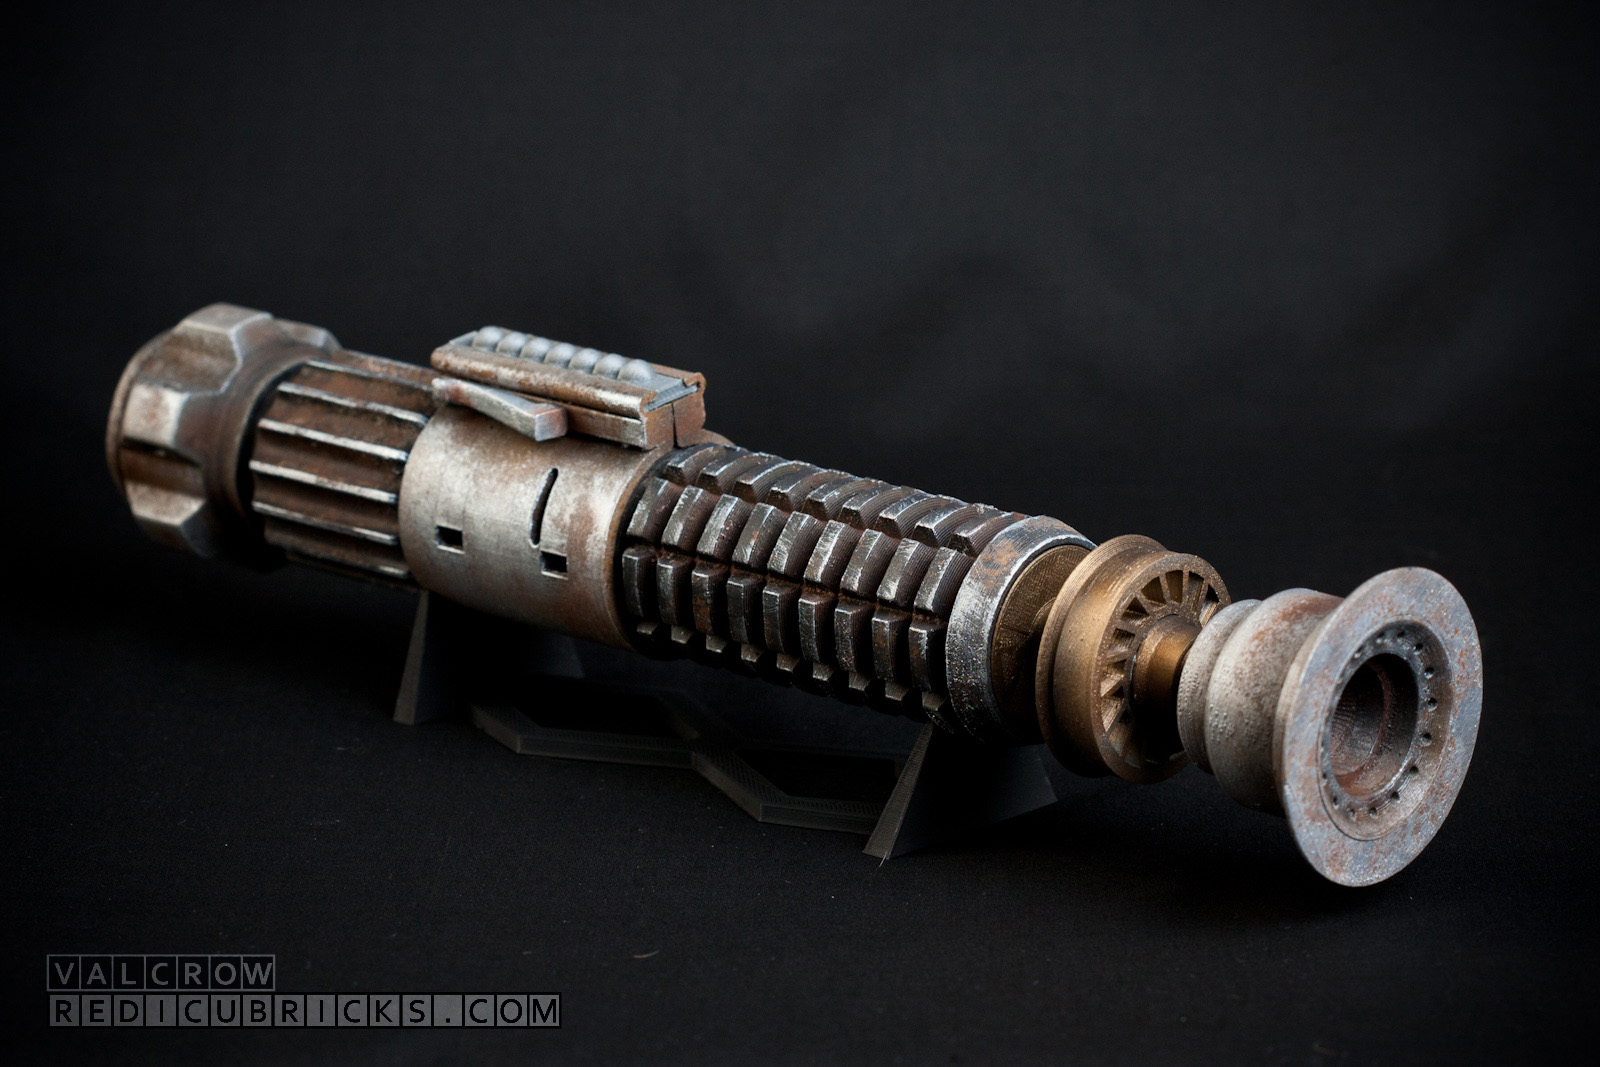
Good luck!
Trackbacks for this post
You must log in to post a comment.